# Custom events
{% hint style="info" %}
This article covers frontend Custom events – there are also custom events available in the backend.
{% endhint %}
Custom events are events that can only be triggered by using the *Trigger a custom event* action. In other words, they have to be triggered by another workflow. They can accept parameters that can be referenced in the action steps inside of the workflow.
You can trigger custom events that are on the same page, or inside of a reusable element that's directly placed on the page you are currently working on by using the *Trigger a custom event from a reusable element* action.
## What are custom events for?
Custom events have several useful properties:
### Avoid repeating work
Since custom events can be called from anywhere on the page, you can avoid having to duplicate workflows.
For example, let's say you have an application that handles documents; you have one *Save* menu option under *File - Save*, and another as an icon in a toolbar. The two do exactly the same thing; they save the contents of a input field to the database.
Instead of using two identical workflows to save the document, you can place the actions needed to save it in a custom event, and trigger that workflow from both places.
### Maintain consistency and prepare for future changes
Custom events also help you standardize things that happen in your application. Let's say for example that you use a [popup container](#user-content-fn-1)[^1] to show messages to your users such as *The changes have been saved.* By using a custom event to show that popup, you can ensure that it looks and behaves the same no matter what the message is. Should you later decide to move away from a popup and instead use an [Alert element](#user-content-fn-2)[^2] you can make that change in just one workflow and it will be replaced all across the page.
### Trigger a workflow in a reusable element
By placing a custom event inside of a reusable element, that workflow can be triggered from the parent of that reusable element. For example, if you have a page called *index* and you place a reusable element called *popup-message* on that page, you can trigger any custom event inside of *popup-message* from the index page (and any other page where you place the reusable element).
{% hint style="info" %}
**Note:** Triggering custom workflows works only in one direction: from the parent page to the child reusable element.
{% endhint %}
## Creating a custom event
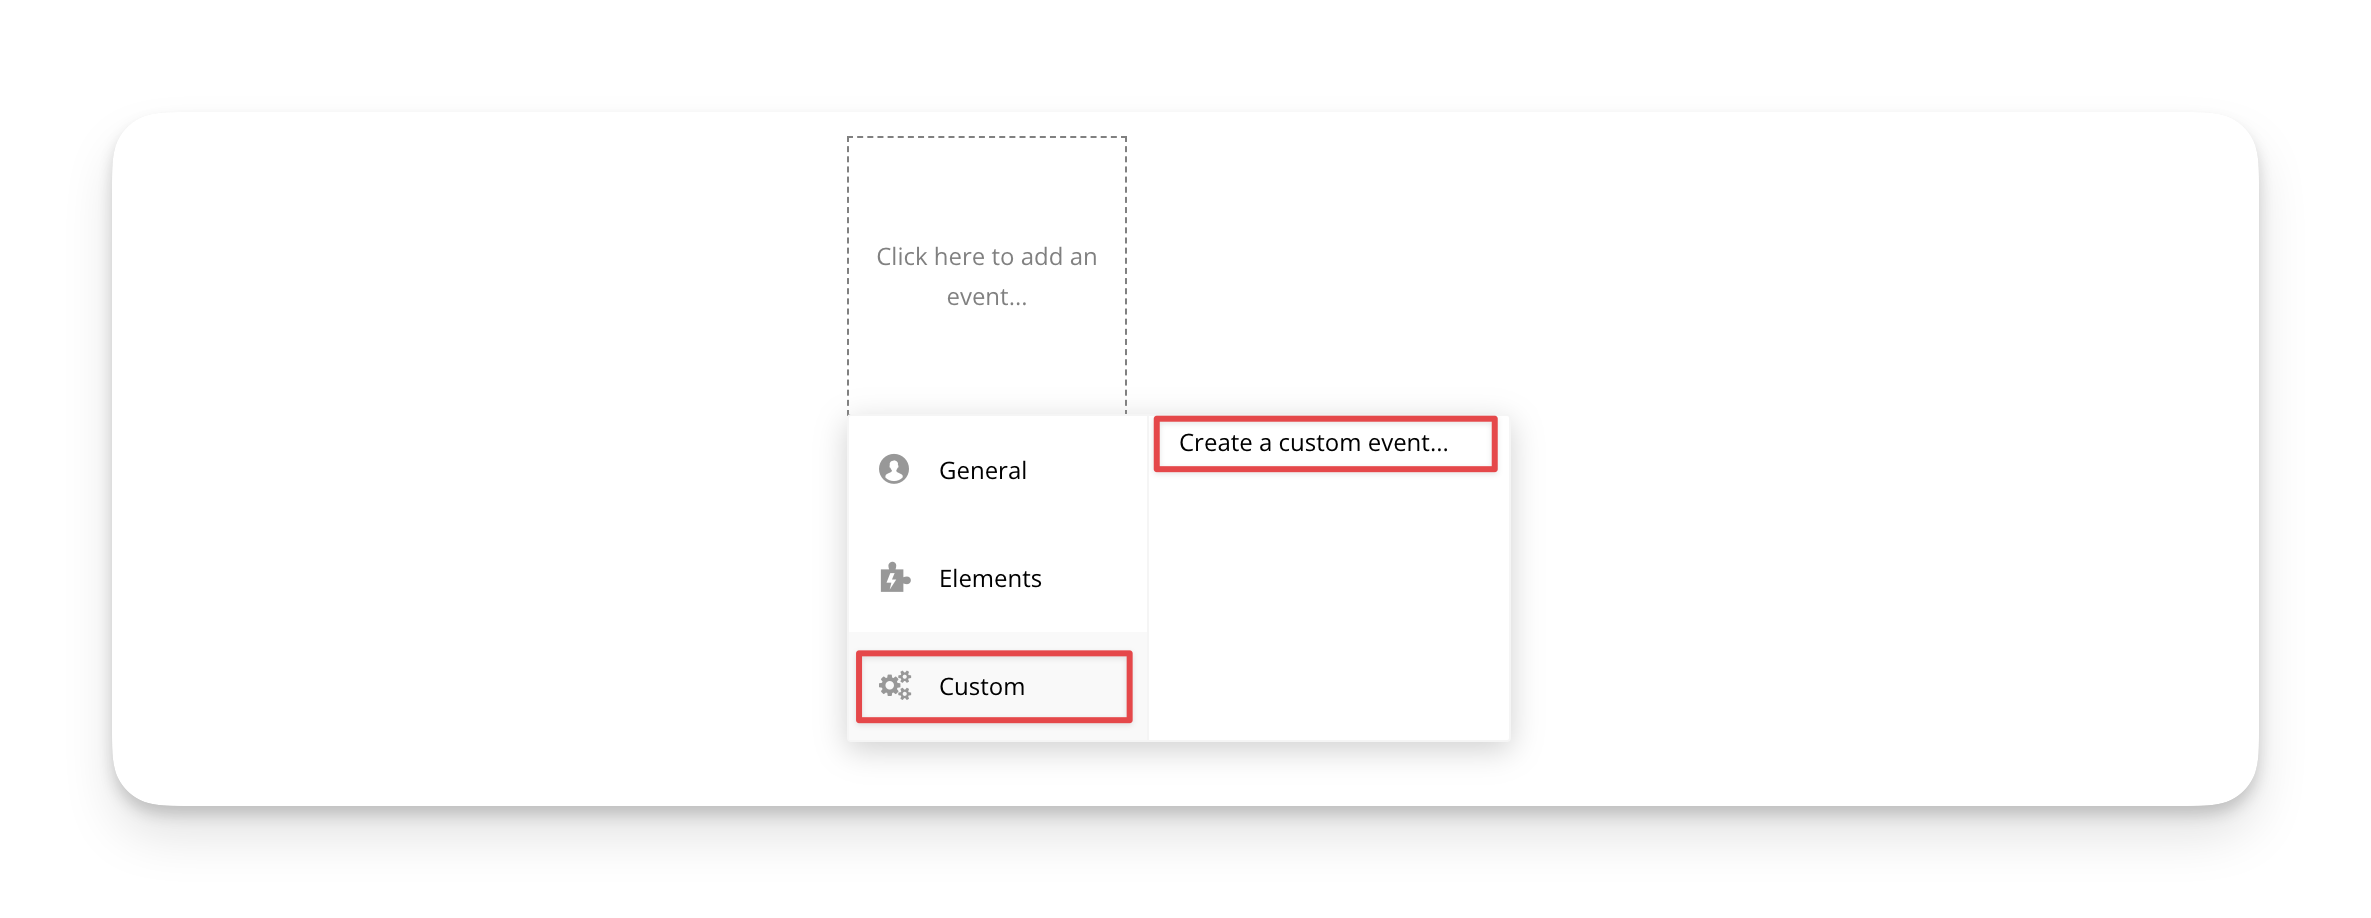
To create a custom event, first navigate to the *Workflow* *editor*, and click *Click here to add an event... .* From the dropdown menu, pick *Custom* and *Create a new custom event.*
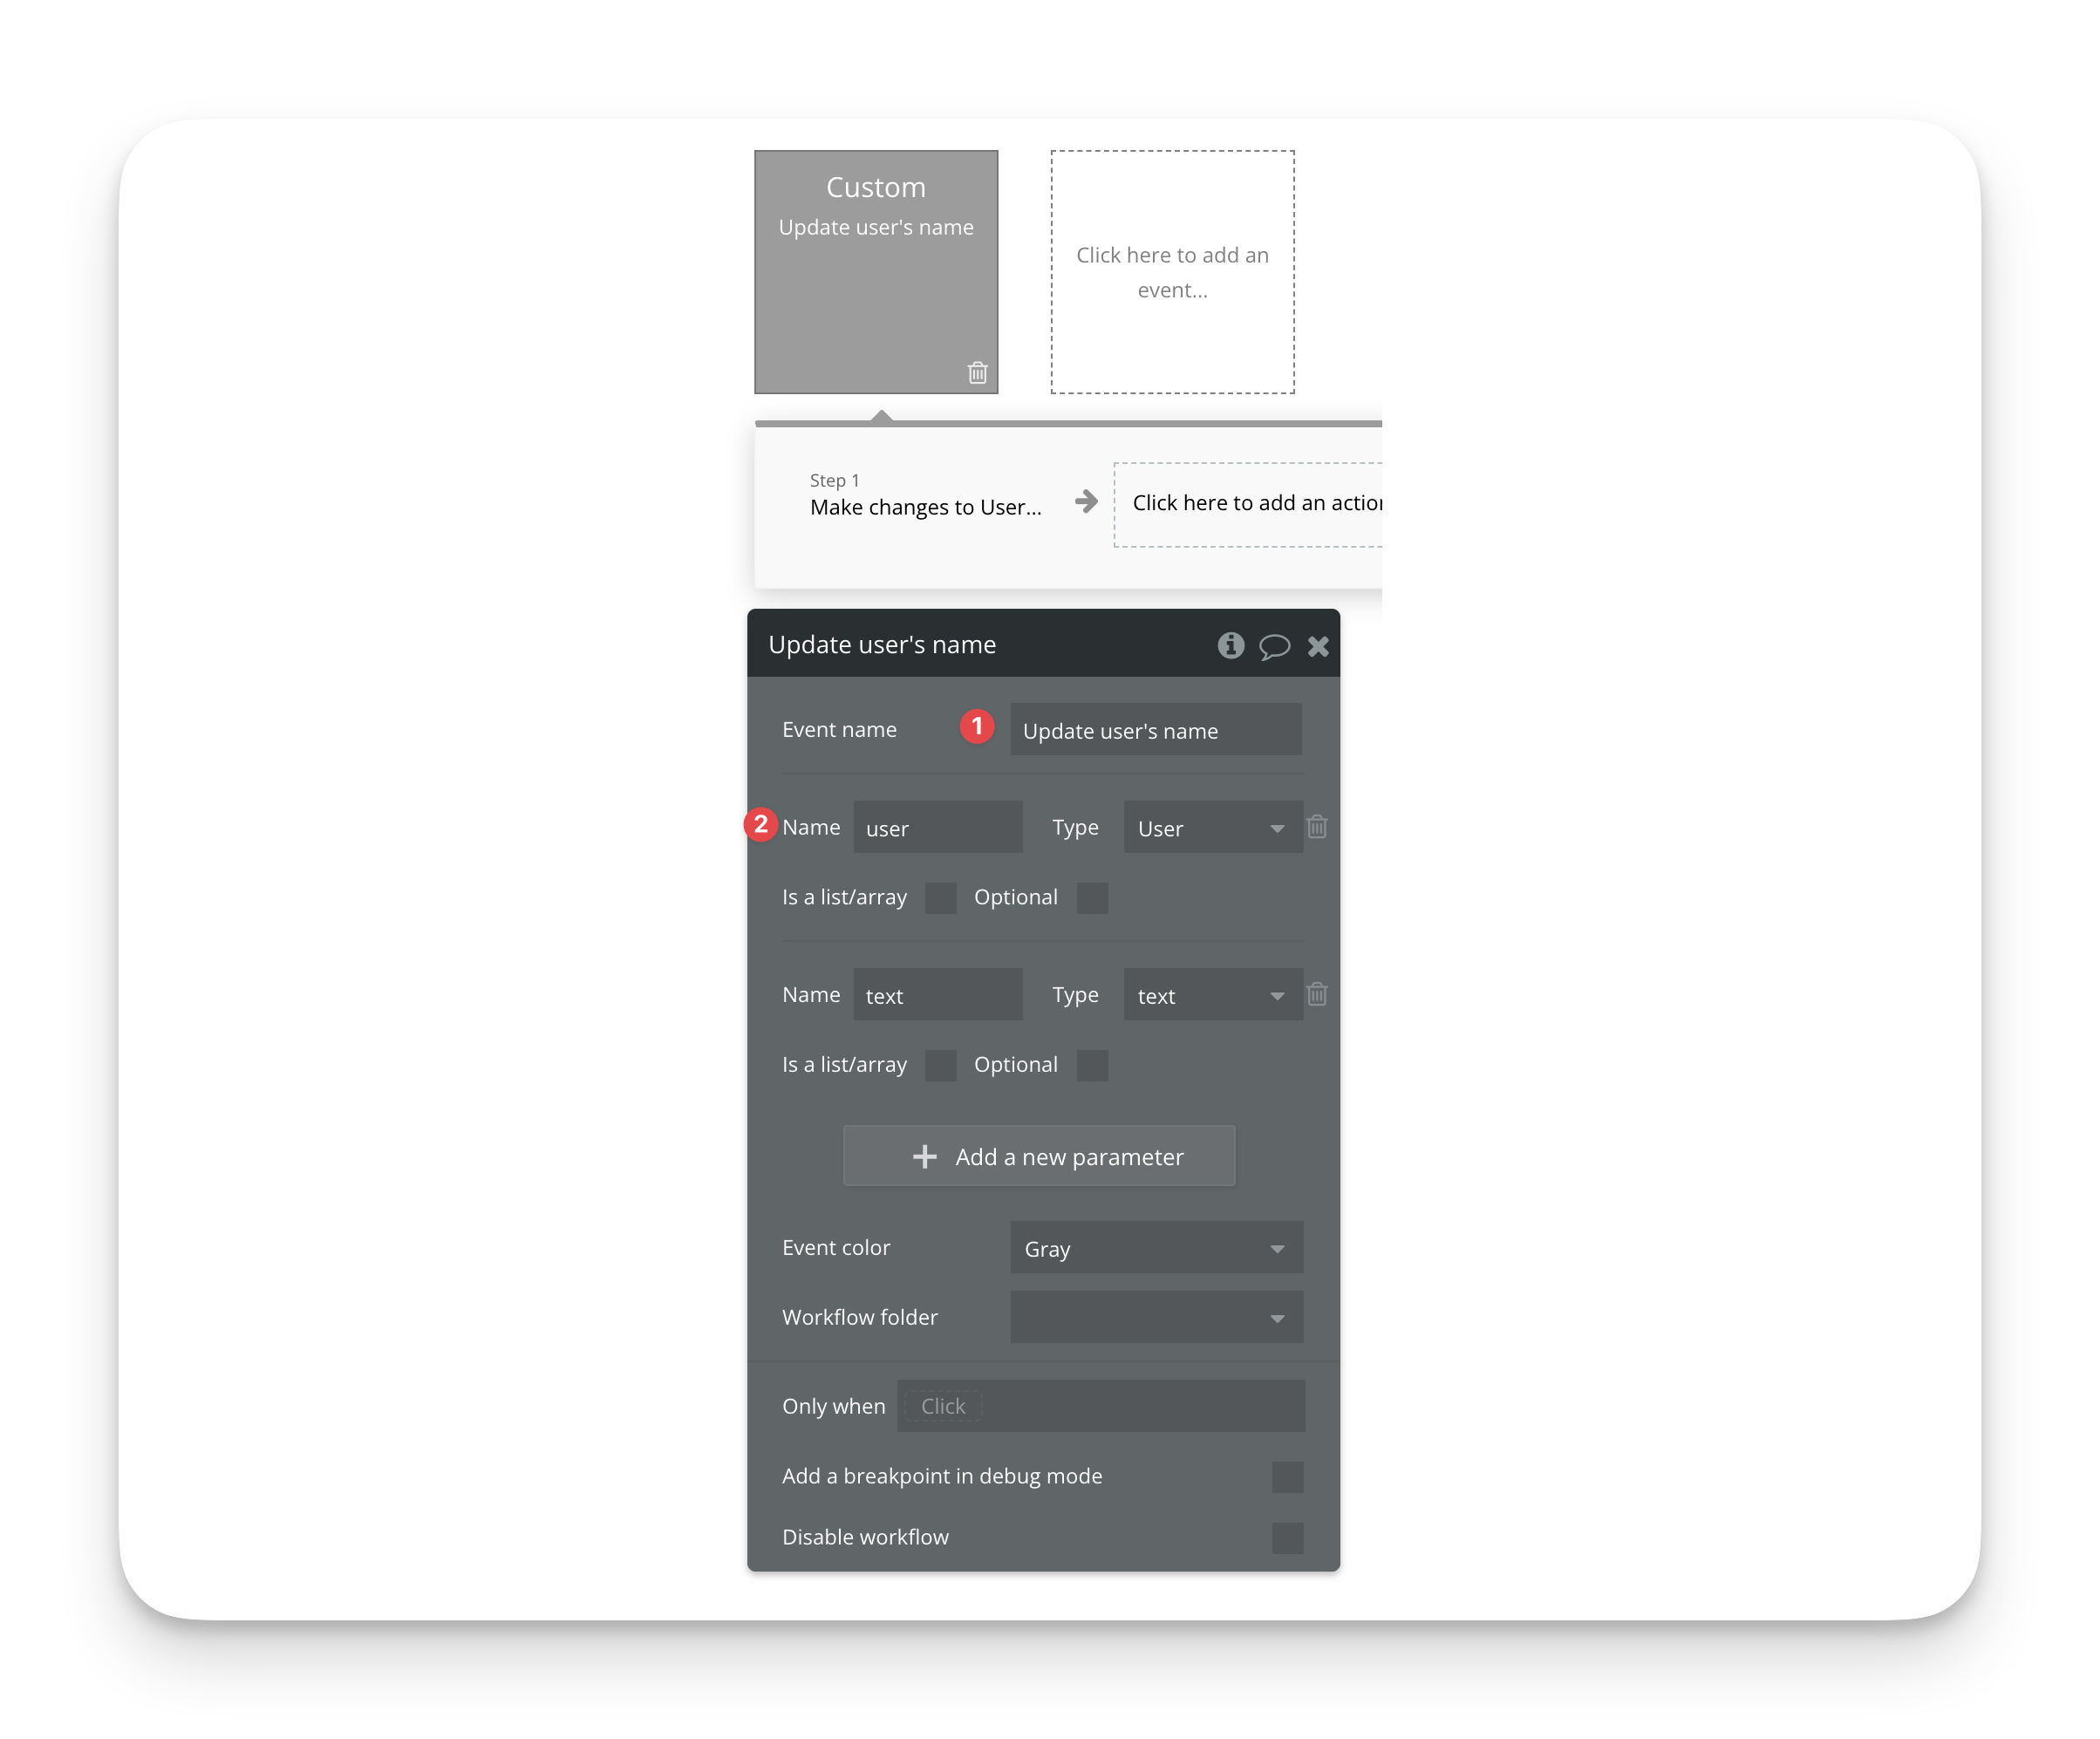
You will be taken to the workflow properties where we can assign some parameters. We'll use this workflow to change the name of a specificed user, with the *user* and the *name* as parameters:
1. First, we give the event a *name*. The name doesn't affect how it works, but it's useful to make it descriptive and easy to recognize
2. Then, we'll set up two parameters by clicking the *Add a new parameter* button. Parameters let you pass any kind of data to the workflow, and use that information in actions inside of that workflow.
1. First, we'll pass a user: that is the user who's name we want to change
2. Then, we'll pass a text: this is the new name that the user will be given
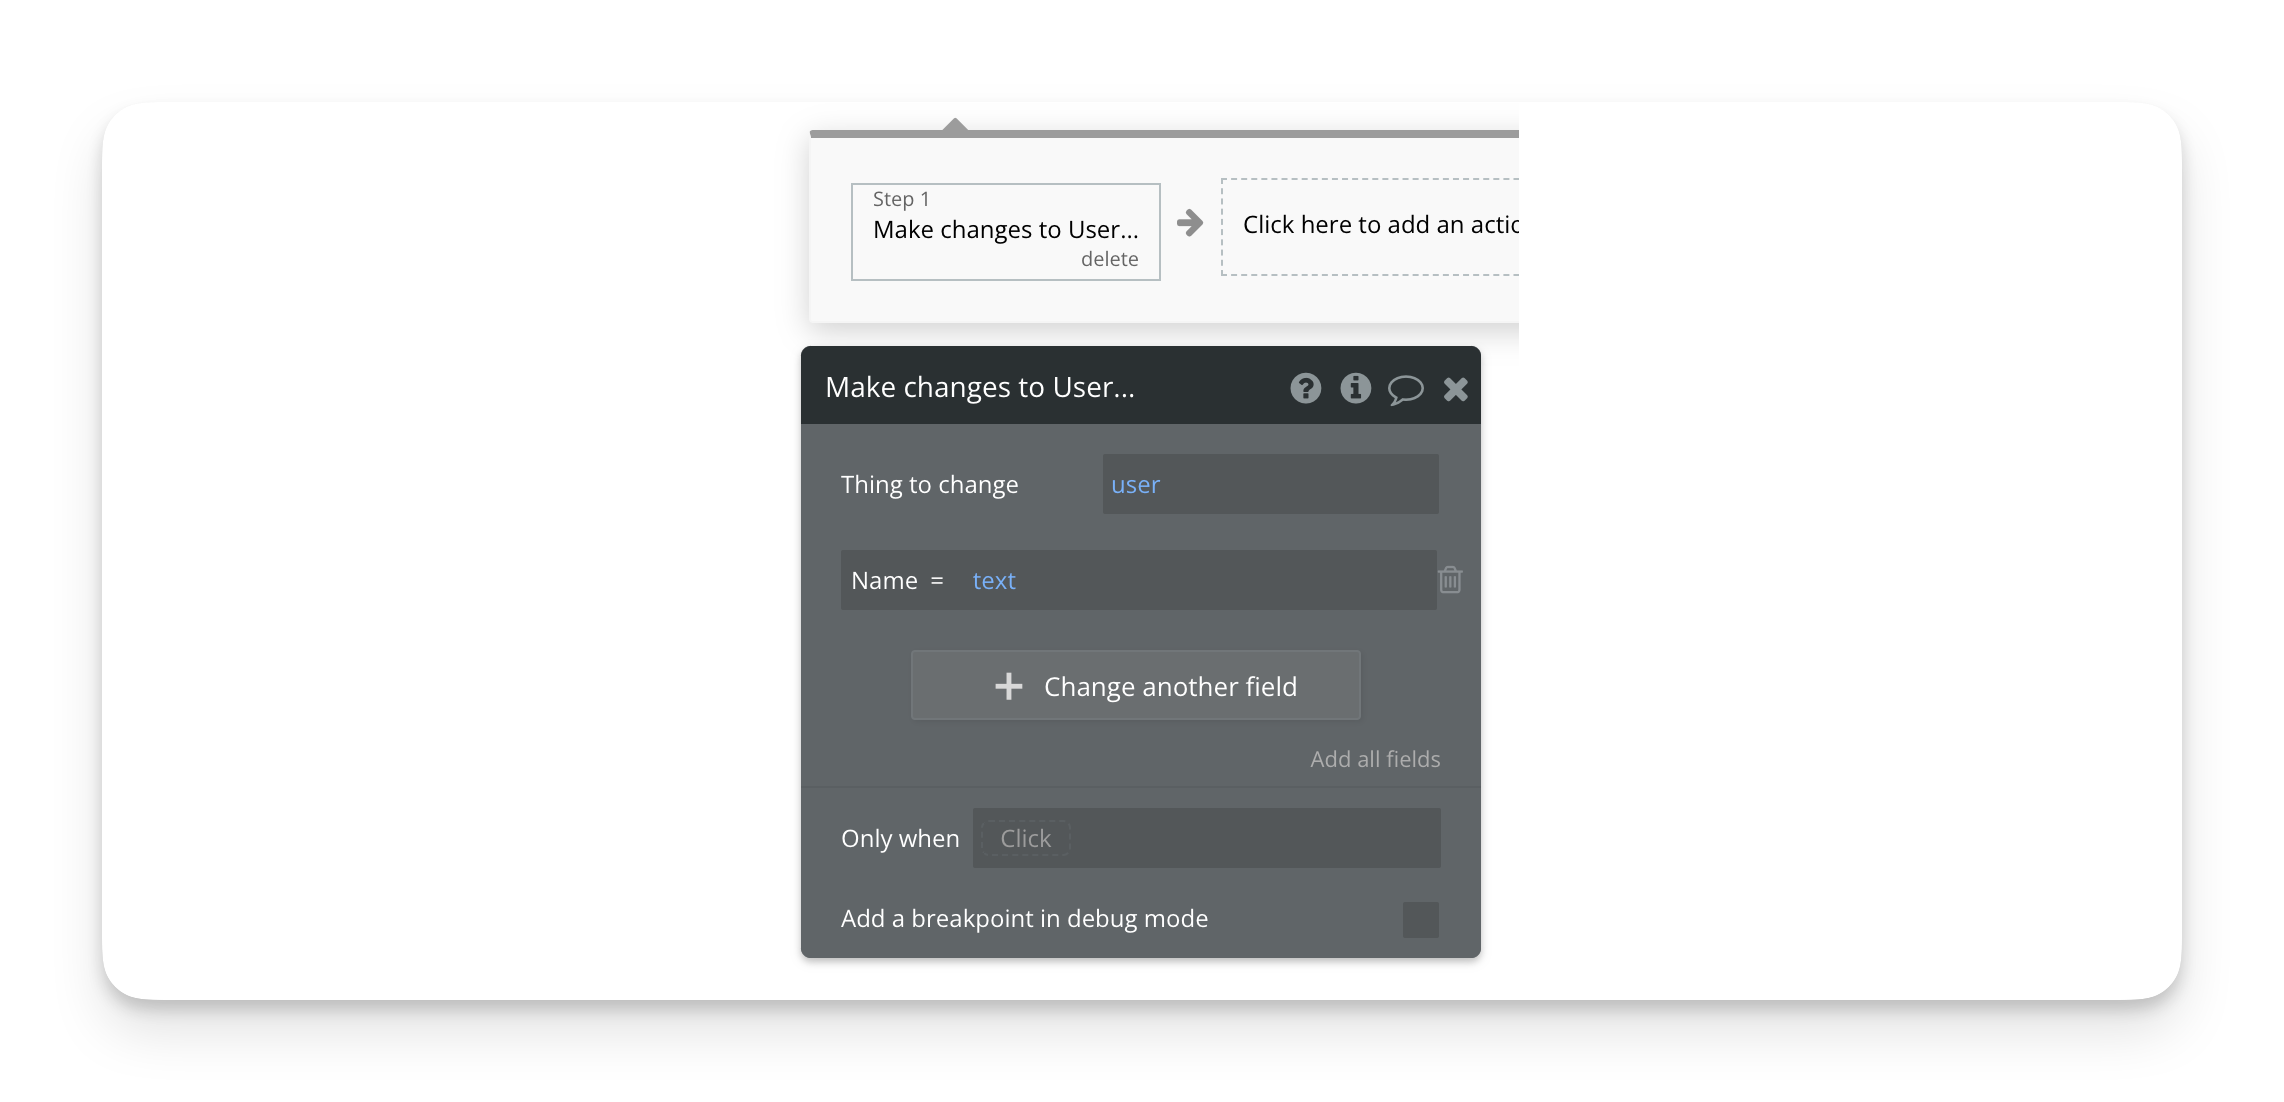
Now we have a custom event that accepts two things: a user and a text. Let's reference those in an action:
We'll add a *Make changes to a thing* action. In the *thing to change* we choose *user,* which is the name we gave the first parameter. Then we pick the *Name* field on the user, and set it to *text*, which is the name of the second parameter.
This way, we have set up a custom event that can change the name of *any* user by asking for it as a parameter.
By setting up custom events for key workflows in your app, you can make sure they work consistently and are not duplicated across your app.
## Scheduling a custom event
A custom event can also be scheduled to run at a specific time by using the *Schedule a Custom event* action and providing a number of seconds of delay before the event should trigger.
{% hint style="info" %}
Scheduling a custom event is a client-side action, and consequently it will not run if the page is closed. If you want to schedule a workflow to run even if the user has closed the app, you can use server-side API workflows:
Article series: [The Workflow API](https://manual.bubble.io/~/changes/oSsRRFoN6bhUP7nqCRaz/help-guides/integrations/api/the-bubble-api/the-workflow-api)
Article: Scheduling [API Workflows](https://manual.bubble.io/~/changes/oSsRRFoN6bhUP7nqCRaz/help-guides/integrations/api/the-bubble-api/the-workflow-api/api-workflows/scheduling-api-workflows)
{% endhint %}
## FAQ: Custom events
#### Is there a difference between triggering a custom event and scheduling a custom event to occur with a 0 second delay?
Yes, there is.
Let's say you have a parent workflow that has some actions, then a "Trigger a custom event" action, then some more actions. When the parent runs that Trigger action, the parent will pause and wait for the custom event to complete before running the actions that come after it. This is convenient in part because the custom event will be able to see the context of what happened in the actions before it in the parent workflow.
In contrast, if you schedule the custom event to occur with delay 0, that custom event could end up running in parallel to the rest of the parent workflow.
#### How are custom events executed?
Whenever a custom event is triggered inside of another workflow, the workflow will stop at that point, run the custom event until it is completed, and then move on to the next action in the "parent" workflow. You can use this to control some aspects of how workflows are triggered. You can read more about how workflows are triggered in the link below.
Article section: [The order in which actions are triggered](https://manual.bubble.io/~/changes/oSsRRFoN6bhUP7nqCRaz/help-guides/logic/actions#the-order-in-which-actions-are-triggered)
[^1]: The *Popup* container type is a a group that is displayed above all other elements and is centered on the screen regardless of the scrolling position of the page.\
\
Article: [Popups](https://manual.bubble.io/~/changes/oSsRRFoN6bhUP7nqCRaz/help-guides/design/elements/containers/popups)\
Reference: [Popups](https://manual.bubble.io/~/changes/oSsRRFoN6bhUP7nqCRaz/core-resources/elements/containers#popup)
[^2]: The *Alert* element is used to quickly flash a text message on the screen.\
\
Reference: [Alert](https://manual.bubble.io/~/changes/oSsRRFoN6bhUP7nqCRaz/core-resources/elements/visual-elements#alert)